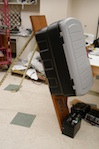
Here is a view of the final product. Total cost is around $100 - 150 for all the parts (in 2011 dollars)
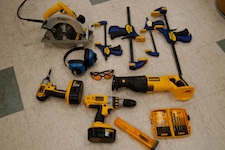
Power tools and related for cutting the pressure treated 2x12, the unistrut, and the pipe to the proper dimensions.
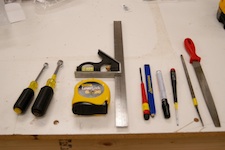
Hand tools required for putting the enclosure together.
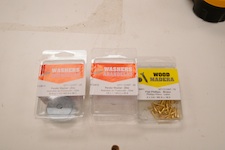
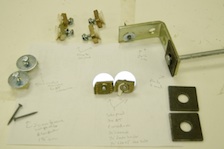
Note here the two sizes of fender washers required for the tripod: 5/16" for the quarter inch bolts and 1/8" for the wood screws securing 'things' like the hinge, 90 degree angle brackets and actionpacker to the pressure treated 2x12a. The other item in this picture are small wood screws, used to secure the instrumentation to the wooden backpanel inside the actionpacker.
These parts and pieces here are required for finishing the tripod assembly in the field. From the top and around clock-wise are:
Hinge to unistrut legs connection -- 4 pcs each 1/4" cone nuts, 1/4" regular washer, 1/4" x 1" hex bolts
Pressure treated 2x12 to ground anchor -- 1-5/8" wood screw, 1/8" fender washer, 90 angle for unistrut, 12" spike and washer (although if budget allows the spike could be upgraded to a 24 or 36 inch screed stake for better anchoring performance).
2 pcs (spikes not pictured) spike washers for the unistrut leg ground anchor.
2 pcs each 1/4" cone nut, 5/16" fender washer, 1/4" x 1" Hex bolt... up to 1.5" may also and give you more flexibility on how to install the solar panel.
2 pcs wood screws to secure the wooden backpanel inside the actionpacker... Use something larger than 1-5/8" Maybe 2.5" instead. There is enough space in the way the plastic molding of the actionpacker is done that 3/4" wooden back plate + actionpacker & air space doesn't leave enough screw threads to get good purchase on the pressure treated 2x12.
Finally, for securing the cross arm to the two unistrut legs 2pcs each 1/4" cone nuts, 5/16" fender washers, 1/4" x 1" hex bolts (that could also be longer for more in the field flexibility).
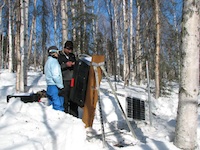
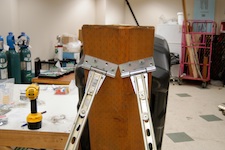
A view of the instrument shelter tripod minus the cross arm during the initial build
Similar to the Crane tripod this one uses hinges and unistrut. In this photo you can see them attached to the pressure treated 2x12.
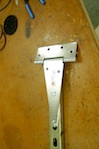
This shows the hinge/unistrut interface. Use 1/4" x 1" bolts, regular washers and unistrute spring or cone nuts. The bolts go nicely in slots 2 and 4 of the unistrut.
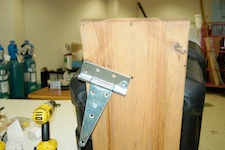
This is a view of the hinge being mounted to the pressure treated 2x12. In the middle of the 2x12 mark 6" from the end. That is the '+' shown adjacent to the right corner of the hinge. On the edges mark 4.5" down and put the left corner of the hinge at the mark. Repeat the process for the right hinge . The placement of the hinge doesn't need to be precise with respect to the 4.5" and 6" marks, rough will be good enough for the tripod to have a firm footing on uneven ground.